Camping guides
How to build a campfire: a guide for Australian campers
)
Most people are surprised how difficult it is to get a campfire going. Here's the playbook that gets you to a crackling fire without the trial and error - plus the one trick nobody mentions.
Kids stop running around and stare into the flames. Partners and mates settle in. The day's adventures are retold, plans for tomorrow get made - and stories that wouldn't get told anywhere else come out. They call it the bush telly for a reason — a good campfire is the very best part of almost any Australian camping getaway.
The only catch — most people are surprised by how tricky it is to actually get one going. It's not as simple as putting a light to a log. Wet wood, not enough kindling, a fire that suffocates before it catches, a windy night that blows the flames sideways — these are the lessons most campers learn the hard way.
This guide gets you to the roaring fire without the trial and error. Gear, firewood, structure, wet-weather hacks, and where you're actually allowed to light one in Australia — everything you need to build a campfire that keeps burning.
TL;DR — How to build a campfire in Australia
Check fire bans first. Total fire ban days override everything — check your state's fire authority on the day of your trip.
Get the right kit. Long-neck lighter, waxy fire starters from Bunnings, an axe, and far more kindling than you think you need.
Hardwood for the long burn. Ironbark, redgum, or box. Bagged from Bunnings beats servo wood every time.
Give it room to breathe. Loose stacking beats a dense pile. Build UP, not OUT — heat rises.
Wet wood? Dry it next to the flames first. Pop the next pieces beside the fire, not on it. They'll be ready when you need them.
Still struggling? Wander over to a neighbour with a roaring fire and ask for a few hot coals. Old-school bush etiquette — nobody will say no.
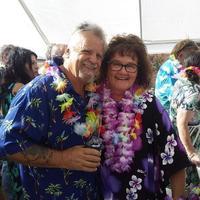
Meet your campfire coach
)
Your campfire coach Kieran, earning his stripes in the kind of soggy weather that makes this guide necessary.
I'm Kieran — a marketing specialist at Camplify, and someone who's worked across the camping and tourism industry for close to a decade. The other half of that decade I've spent on the other side of the equation: parked up in an RV somewhere quiet, getting fires going, getting them wrong and (occasionally) getting them right.
Everything below is what I've picked up along the way — from owners, from neighbours around the fire, and from a lot of nights of trial and error in the bush. Steal what works.
— Kieran (@kodo_gram)
Before you light: where campfires are actually allowed in Australia
)
Before any of the rest of this matters, the rule that overrides everything: always check your local fire authority on the day of your trip.
Total fire ban days are non-negotiable, and they can be called at short notice across any state in summer or in dry stretches.
National parks: most prohibit fires outside designated fire pits, and many prohibit firewood collection altogether. Some allow gas stoves only. Always check the specific park before you assume — rules vary by park, not just by state.
State forests and reserves: vary widely. Many allow fires in established fire-pit rings at designated campgrounds; very few allow open ground fires.
Hipcamps & privately owned bush campsites: set their own rules, and many of them are the best places to actually have a fire. Glenworth Valley on the NSW Central Coast is a great example — fires permitted, foraging allowed, the kind of place you can take the kids on a bushwalk to collect kindling for the night's fire.
Caravan parks: open campfires are uncommon, fire pits sometimes permitted at the more bush-style parks — always check before you book.
Where to check fire bans by state:
NSW - NSW Rural Fire Service
VIC - Country Fire Authority (CFA)
QLD - Queensland Fire Department
TAS - Tasmania Fire Service
SA - SA Country Fire Service
WA - Department of Fire and Emergency Services (DFES)
NT - NT Bushfires
ACT - ACT Emergency Services Agency
The campfire equipment that makes the difference
)
Half of starting a campfire is having the right kit before you sit down to do it.
Whether you're learning how to start a fire for the first time, or you've done it a hundred times, the gear list is more or less the same. Here's what actually matters.
A long-neck lighter. The single most underrated piece of campfire gear. A standard thumb-strike lighter forces you to put your face near the flames once the kindling catches; a long-neck lets you light from a safe distance. Six bucks at any servo, makes a much bigger difference than it sounds.
Fire starters. Get the proper waxy ones from Bunnings. A single starter the size of a sugar cube gives you a 2–5 minute steady flame to feed your kindling onto. They can be the difference between a fire that catches first time and an hour of frustration.
Kindling — and a lot of it. First-time campers always underestimate this. You can never have too much kindling. It's not as simple as flame-to-log — you need a steady chain of small, dry, fast-burning material building up to the bigger pieces. In the Australian bush, dried gum leaves are hard to beat as natural kindling — full of eucalyptus oil, they catch almost instantly. Bring them in by the handful when you forage. (Caveat: that same flammability is exactly why you need to be careful where you light — more on that in the safety section.)
A small axe or hatchet. Bagged hardwood from Bunnings comes in big logs, and you'll need to split them down to start the fire. An axe lets you create your own smaller pieces and your own kindling from a single big log — cheaper than buying separate kindling bags, and more satisfying.
A fire pit. Lifts the fire off wet ground, contains it for safety, and many Camplify rigs include one in the inclusions — more on this further down.
Optional but brilliant: a small portable electric blower. Sounds silly until you've used one. Stubborn or damp fires get a flare-up from a few seconds of forced oxygen that no amount of huffing-and-puffing will match. Don't have one? A cardboard sheet or a chopping board flapped as a hand fan does the same job slower — same principle, same result.
A note on methylated spirits: some campers swear by a splash on the kindling to get things going. It works, but it's the most dangerous trick in the kit — flare-back is real and serious. Decent fire starters do the same job without the risk. I'd skip it.
Choosing your firewood (and where to actually get the good stuff)
)
Not all wood burns the same.
Hardwoods burn hotter, slower, and longer. Softwoods catch faster but burn out quickly. For a campfire that lasts the night, you want hardwood every time.
The Australian hardwoods to look for:
Ironbark — the gold standard. Slow burn, intense heat, long-lasting coals.
Redgum — almost as good as ironbark, easier to find across the east coast.
Box (yellow box, grey box) — excellent burn, common across south-east Australia.
Mallee root — burns incredibly hot, common in SA and Vic.
Where to actually buy it:
Bunnings: bagged hardwood, $15–20 a bag, reliable and dry. The benchmark for convenience-and-quality balance.
Servos and petrol stations: handy on the road, but anecdotally the quality drops — often a softer mix, sometimes damp from sitting outside. Use them as a backup, not a first choice.
Specialist firewood suppliers: best value if you're going for a week and can plan ahead — bulk hardwood at a fraction of the per-bag price.
Quantity rule of thumb: one bag burns through in a typical evening. Going for a real roaring fire, or working with damp wood? Plan for one and a half to two.
Foraging is the fun option. A bushwalk with the kids collecting fallen wood is one of the best parts of a camping trip — and you'll save a bomb. A single roaring fire burns through one and a half to two bags of bought wood a night, so foraging adds up fast across a longer trip.
The two rules of foraging:
Only ever pick up fallen wood. Never strip live trees. Beyond the environmental damage, green wood won't burn anyway — it's too full of sap and moisture.
Check the rules where you are. Most national parks ban collection. Many private campgrounds (like Glenworth Valley) explicitly allow it.
What to look for in foraged wood
You're hunting for the sweet spot: fallen, dry, but not yet rotten. The word for it is seasoned.
Green wood — anything still alive or recently down — is full of moisture and will hiss, smoke, and refuse to catch. A quick test: snap a small branch. If it bends before it breaks, or the inside looks pale and damp, leave it. Seasoned wood snaps cleanly with a sharp crack, and the grain inside is dry and grey-brown.
The other end of the spectrum is just as useless. Wood that crumbles in your hand, has bark sloughing off in sheets, or feels spongy is too far gone — it'll smoulder more than burn and put out almost no heat. If it looks like something a beetle would live in, it probably is.
Good rule of thumb: pick it up, knock two pieces together. A dull thud means moisture or rot. A clean, hollow knock means you've found your firewood.
The wet-wood reality. If it's been raining, or even just a dewy winter morning, foraged wood will be damp and slow to catch. Not impossible — but you'll need more kindling and more patience. The drying trick is in the next section.
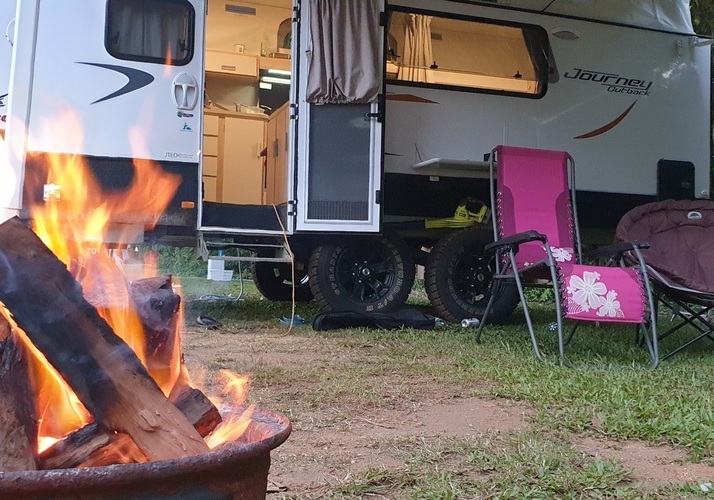
How to build a campfire that actually keeps burning
)
A kind of warmth you'll never get from a heater.
This is where most campfires fail. Knowing how to build a fire properly comes down to one rule above all others — give it room to breathe. A dense pile of wood squashed together suffocates the flame before it gets going. As tempting as it is to pile it all on, the fire needs oxygen as much as it needs fuel.
Build UP, not OUT. Heat rises. The next piece of wood needs to be above the flame to catch and fall into the fire — that's the compounding effect that keeps things going. A fire sprawling sideways across the ground never builds the concentrated heat it needs.
Layer incrementally. Start with a base of fire starters and a generous mound of kindling. Dry twigs and gum leaves on top. Then small pieces of wood. Then medium. The big logs go on last, once you've got a real flame. Skip a step and you'll smother the fire.
Three structures that work:
Pyramid (teepee): small kindling at the centre, larger pieces leaning in from all sides to form a cone. Intuitive, great for getting going. Lets the flame climb straight up through the middle.
Log cabin: parallel pieces of wood stacked in alternating layers, like a tiny cabin around the kindling pile. Burns longer, better for sustained heat.
Hybrid: pyramid inside a log cabin frame. Best of both — fast catch, long burn.
)
The classic teepee fire structure - my personal favourite.
Pick whichever feels right. What matters more is the breathing room between pieces, not which shape you choose. That's how to keep a fire going for the whole night — not just the first hour.
The wet-wood trick. Once your fire's going, place your next pieces of wood near the flames rather than on them. They'll start dehydrating, warming up, and losing moisture while you're warming up too. By the time you need them, they're ready to burn. This is the single best trick for winter camping or damp campsites.
The windy-night hack. A light breeze helps a fire get going. A strong wind blows it out and scatters embers — dangerous and frustrating. Use a fire pit, or build a small ring of rocks, on the lee side of a windbreak — your RV, a tree, the side of the camper trailer.
No fire pit? The two-log trick. If you're dealing with wet or soggy turf without a fire pit: lay down two flat logs or chunky pieces of firewood as a base, then build your fire on top. Lifts everything off wet ground and lets air flow underneath.
Oxygen, properly applied. A small electric blower will save a struggling fire in seconds. A cardboard sheet or chopping board flapped as a hand fan does the same job slower. The principle's identical — oxygen feeds the flame.
And the trick nobody mentions. If you're really struggling — wet wood, no luck, mounting frustration — wander over to a neighbour with a roaring fire and ask for a few hot coals. It's old-school bush etiquette: nobody will say no, you'll usually get a laugh and a yarn out of it, and a couple of hot coals tucked into your kindling will do in two minutes what a long lighter couldn't do in twenty. Just make sure you have a shovel to carry them over with.
Stay safe — the four campfire conditions to watch for
Wind. A light breeze is fine. A strong wind blows embers into dry foliage and starts the kind of fire you don't want any part of.
Dry foliage around. Gum leaves and stringy bark catch instantly. Clear a one-metre radius of leaves, twigs, and loose bark before you light.
Hot and dry weather. Check the day's fire danger rating before you light. Total fire bans override everything — see the state-by-state authorities above.
Position. Never under low branches. Never near a tent, awning, or anything plastic. Never closer than three metres from the side of an RV.
When in doubt, don't light. There'll always be another night.
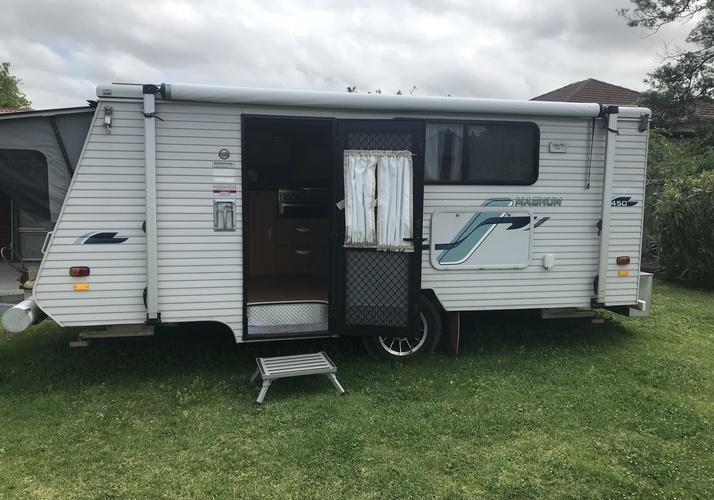
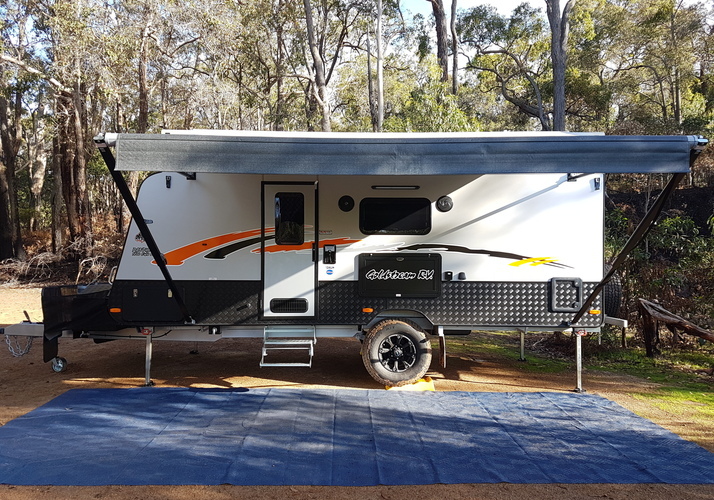
Why a campfire trip is ten times easier with an RV
)
If you've ever packed a small car for a camping trip, you know the problem...
Two bags of hardwood plus tent, sleeping gear, eskies, kids' stuff, chairs — something doesn't fit. Wood is bulky, heavy, and dirty, and it always ends up on top of the bag with your clean clothes in it.
In an RV or motorhome, that whole problem disappears. Most rigs come with dedicated storage — undercab compartments, rear lockers, awning boxes — built for exactly this kind of cargo. Throw your firewood in on top of everything else and forget about it until you're parked up.
Many Camplify rigs include a fire pit in the inclusions. When you're browsing listings, check the inclusions list — plenty of owners include fire pits, axes, and even firewood for the first night. You're not just hiring an RV; you're hiring a setup the owner has refined over dozens of trips. Less to pack, less to forget, more time around the fire.
And the comfort layer matters more than people admit. After a cold night around a roaring fire, walking three metres to a warm cabin with mains power and an electric blanket beats crawling into a damp tent. Especially in winter — [link: How to stay warm camping in winter →].
With Camplify, there are thousands of RVs across the country ready to roll, hired direct from local owners who know their rigs inside out. Most are a short drive from where you live. It's never been easier — or more affordable — to be the camper with the proper campfire setup.
Hire an RV
Thousands in your local areaReady to kick back by a campfire?
The roaring fire isn't a mystery — it's a method. Get the gear. Choose the right wood. Build for breathing room. Work with the conditions. Trust the structure to do its job. Do that, and the rest takes care of itself.
You'll be the one with the proper campfire setup on every trip, the neighbour people wander over to ask for a few coals, the camper who turns a regular night in the bush into the kind of evening everyone remembers.
See you out there.
— Kieran (@kodo_gram)
The information in this blog is accurate and current as of the date of posting. Please be aware that information, facts, and links may become outdated over time.