Camping guides
How to plan road trip with Google Maps: complete guide
)
Google Maps is the best free tool to use when planning a road trip. Once you’ve had a quick introduction to its features, you’ll be able to create detailed itineraries in no time.
In this guide, our experts will teach you step-by-step how to plan a road trip with Google Maps. You can then open the map on your smartphone via the Google Maps app and use the live navigation feature.
Let’s get started.
Why Google Maps is the Best App to Plan a Road Trip With
Google Maps is the best app to plan a road trip because it is simple and reliable. Once you understand the basics of planning a road trip, you’ll be ready to try out the exciting range of additional features available on Google Maps:
Live Traffic Feed: Google Maps can provide you with real-time ETA’s and provide you with alternative routes to avoid traffic, accidents and road closures.
Alternative Transport: Besides driving routes, Google Maps can also provide you with routes and ETA’s whilst walking, biking or catching public transport.
Local Information: Google Maps provides helpful information including reviews, opening times and more in regard to local restaurants, attractions, events, etc.
Interior Navigation: Google Maps can even be used to find your way around inside large public places like airports and shopping centres.
Sharing: Using the share features, you can send your Google Maps to friends or even cast votes as a group about which destinations to visit.
Offline Maps: You can still use Google Maps even if you're offline thanks to the GPS in your smartphone.
It’s Free!
How To Plan A Road Trip With Google Maps
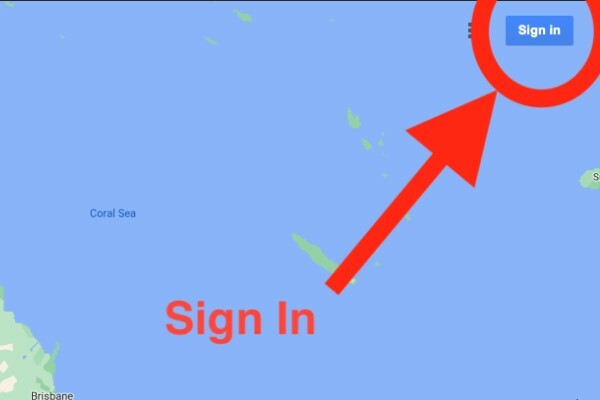
Step 1: Create or Log in to Your Google Account
On your desktop, go to Google Maps and log in to your Google account.
If you don’t have a Google account, create one now.
Tip: A Google account allows you to save your maps to your free Google Drive.
Step 2: Create a New Google Map
Click the three-line menu in the top left corner of Google Maps.
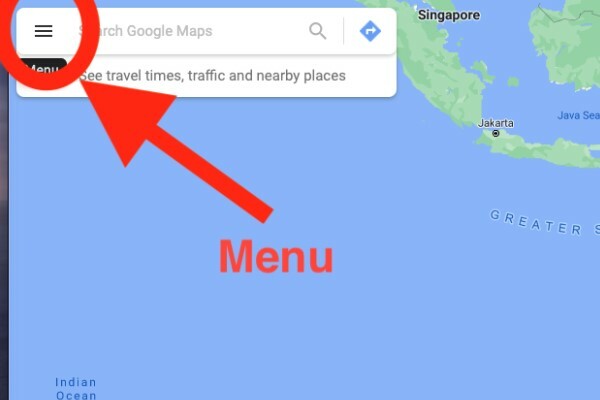
Click “Your Places”.

Click “Maps”.

Click “Create Map” at the bottom of the menu.

Tip: “Your Places” is where your Google Maps will be saved if you want to access them again in the future.
Step 3: Name Your Google Map
After clicking “Create Map” you will be redirected to Google My Maps.
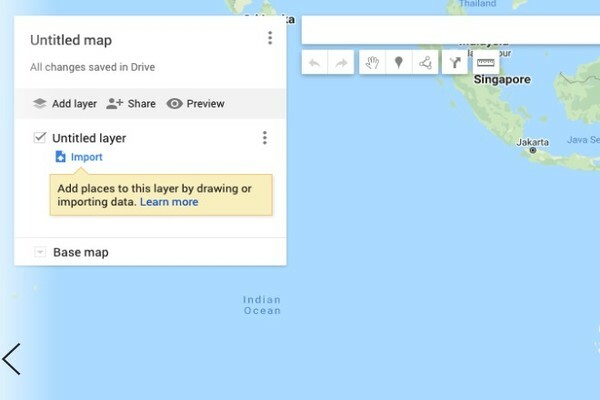
Click “Untitled map” in the control panel on the left.

Type in a name for your map and write a short description.

Click Save.
Step 4: Add Location Pins to Your Google Map
In the search bar, type the location or address of your starting point and click the relevant search result.
Google Maps will place a green marker on your starting point.
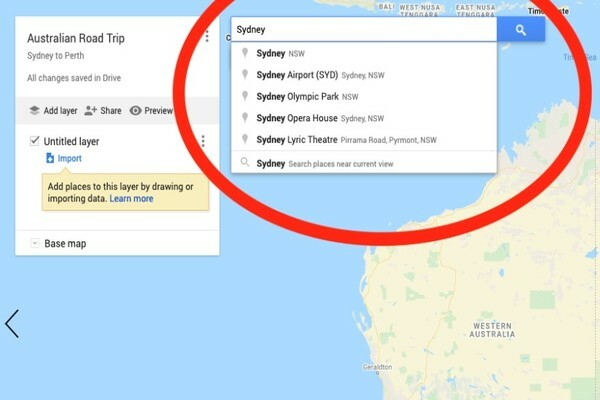
Click “Add to Map” on the information panel.

The green marker will turn blue and your starting point will be saved as a layer in the control panel.

Repeat the above steps to add the rest of your road trip destinations.

Tip: You can only save up to 10 pins per layer on Google Maps. For your first layer, add your major destinations. Later we will create more layers where you save pins for things like attractions or restaurants.
Step 5: Customise Your Pins
Change the Pin Colour and Icon Style:
Click on the destination pin (it will be blue by default).
Click the paint can “Style” button.
Choose the colour you want.
![]()
Choose from the Popular Icons or More Icons.
Click the X or anywhere else on the map.
Change the Name of the Pin or Write a Description:
Click on the destination pin.
Click the pencil “Edit” button.
Enter a name in the top box.

Enter a description in the second box.
Tip: Use the description section to make notes about your destination, such as the attractions or restaurants you want to visit.
Attach Photos or Videos to Your Pins:
Click on the destination pin.
Click the camera “Add image or video” button.
Upload an image from your device or use an image URL.

Click the blue “Save” button.
Tip: Use the image or video section to create an interactive collage of your road trip. You can share this later with family and friends.
Delete a Pin:
Click on the destination pin.
Click the bin “Delete feature” button.
Step 6: Add Layers
When using Google Maps to plan a road trip, you can add up to 10 layers with 10 destinations each. Each layer is used to save and display information about a particular aspect of your road trip (e.g. major destinations, restaurants, attractions, accommodation, etc.).
Rename Your Existing Layer:
Your map will already have 1 layer called the “Untitled layer”. You can see your layers in the control panel on the left.
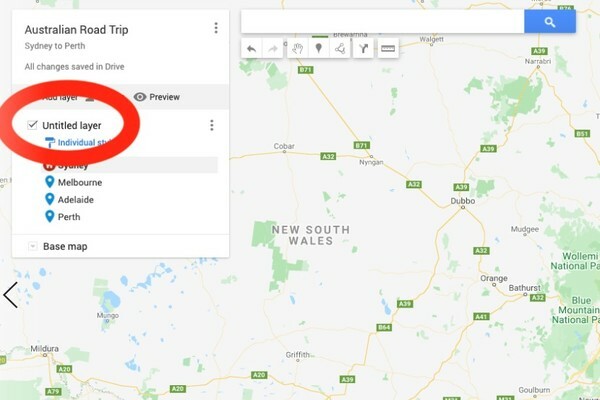
Click “Untitled layer” and change the name to something like “Major Destinations”.

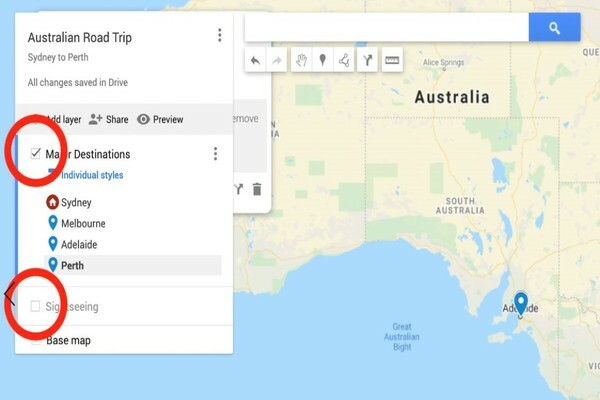
Add a Layer:
Click “Add layer” in the control panel on the left.
A new “Untitled layer” will be created in the control panel. You can rename this layer by clicking the three vertical dots “Layer options” and then click “Rename this layer”.
Move a Pin Between Layers:
Click and hold on the pin you want to move.
Drag and drop the pin to another layer.

Turn Layers On and Off
Check or uncheck the box next to the layer title.
Tip: Turning layers on or off can help you focus on one layer at a time. For example, if you only want to see your major destinations you could turn your second layer off.
Delete a Layer
Click the three vertical dots “Layer options” next to the layer title.
Click “Delete this layer”.
Click the blue “Delete button”.
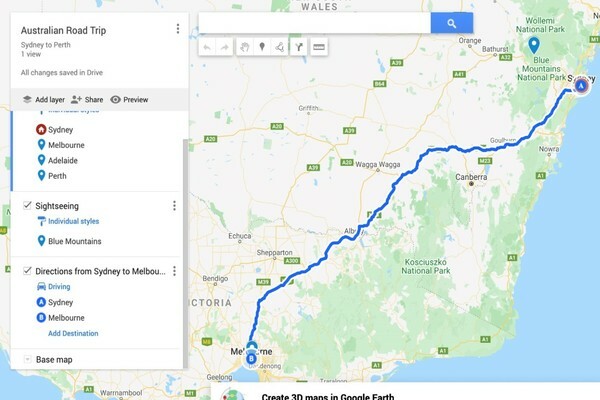
Step 7: Create Your Road Trip Route
Add Directions to Your Road Trip Map
Click the arrow icon “Add directions” button under the search bar at the top.
A new layer will be created called the “Untitled layer”. It will have an A and B point.
To choose your starting point (point A), click on the relevant pin on the map.

To choose your next destination (point B), click on the relevant pin on the map.
The route will be shown as a blue line between point A and point B.

To add more destinations, click “Add Destination” under points A and B (you can add up to 10 destinations).
Tip: Click “Select transportation mode” to switch between routes for driving, walking or bicycling.
Step 8: Adjust Your Road Trip Route
Click anywhere on the blue line.
Hold your mouse over the blue line.

Drag and drop the blue line to match the route you want to take.

Click anywhere else on the map to save the route change.
To undo the change, click on the route again and click the white dot.

Tip: You can also change the route by reordering the pins in the “Directions” layer.

Extra Tip: For full directions, mileage and drive times, click the three vertical dots “Layer options” next to the layer title and then click “Step-by-Step Directions”.

Step 9: Open Your Map With the Google Maps App
Open Your Map in the Google Maps App
Download and sign in to the Google Maps app on your smartphone.
Click the “Saved” tab at the bottom. __
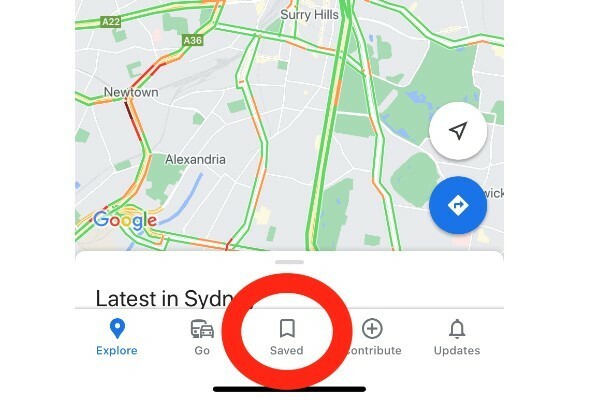
Click “Maps”. __

Choose your saved map.
Step 10: Start Live Navigation of Your Map
Tap on your first destination.
Tap the blue “Directions” button. __
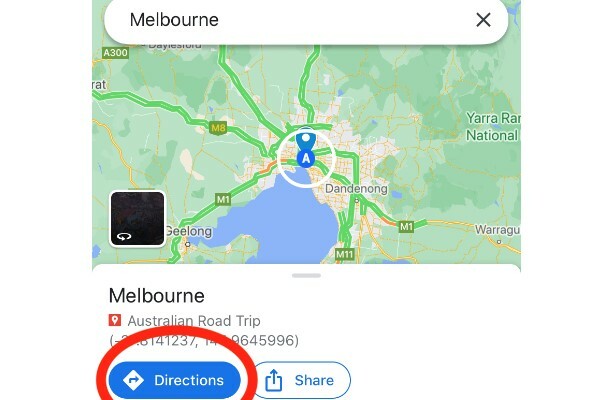
Choose your starting point. __

Tap “Preview” to start live navigation.

Hire A Van For Your Road Trip
Now that you know how to plan a road trip with Google Maps, you’re almost ready to hit Go and start your adventure!
However, there are some things that Google Maps can’t do for you. For example, it can’t provide you with the perfect road trip packing list. Or create a list of fun things to do on a road trip. Or help you out with a heap of road trip food ideas! What's more, we've put together a round up of the best camping apps in Australia to help you out further.
For more awesome articles like these, please sign up for our Camplify newsletter below or check out our blog. Every week we upload in-depth articles about road tripping, camping, itineraries, ideas and inspiration for your future travels.
Why Camplify?
We are proud to be Australia’s largest private caravan, campervan and motorhome sharing community. When you hire a van through our platform, it comes with lots of advantages:
Comprehensive hire insurance
Nationwide NRMA roadside assistance
24/7 customer support
All members are verified
By hiring with Camplify, you are also helping local families who share their van on our platform and supporting many local companies across Australia in addition to ours. So we are very grateful to you.
Sign up if you want to join our beloved community of van life lovers and receive our most recent news and offers.
The information in this blog is accurate and current as of the date of posting. Please be aware that information, facts, and links may become outdated over time.